Selecting a SharePoint or harmon.ie view
harmon.ie Classic allows you to select a SharePoint or Teams view for a location. This is useful if you want to view a subset of the items in the location.
What are the available views?
- SharePoint views: Every SharePoint document library and list has one or more views to control how items are displayed. harmon.ie supports views of type Standard View. These aspects of the SharePoint views are taken:
- Columns. The view can define a set of visible columns for a document library/list.
- Sort. Items can be sorted by one or two columns.
- Filter. Documents, folders and lists can be filtered by criteria. For example, the view can define only items of a specific content type to be shown.
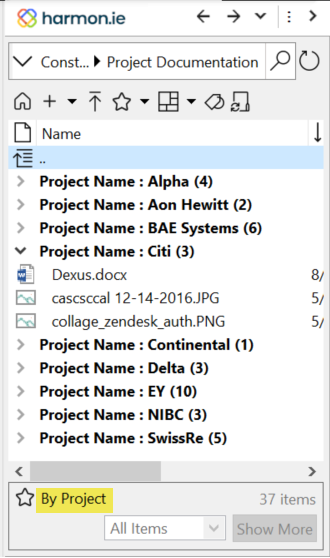
- Group By. Items can be grouped by a category, up to two levels. See Working with groups for more information.
- Folders (applies to document libraries of SharePoint 2010 or later). Specify whether to navigate through folders to view items, or to view all items at once.
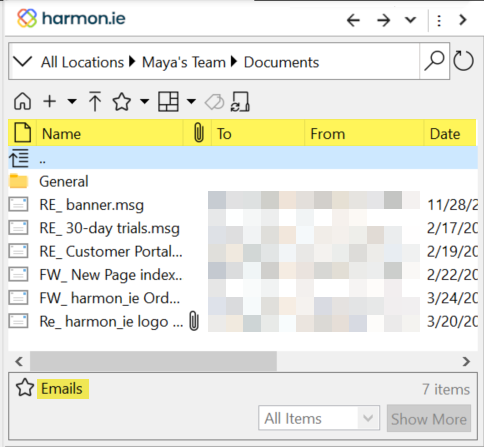
- Email view: When saving email messages to Microsoft 365, harmon.ie suggests creating an Email view. If accepted, email headers will be saved in email columns, and an Email view is added to the Microsoft 365 location. This view shows only email messages, with email columns. This Email view could also be selected in SharePoint or Teams.

- My Checked Out Documents: This view is added by harmon.ie. It shows only documents checked out by you, in a tree view.
- Personal views: After sorting and filtering the document list, you can save the current view as a personal SharePoint view using harmon.ie. This feature works in SharePoint 2013 or later.
How to select a view
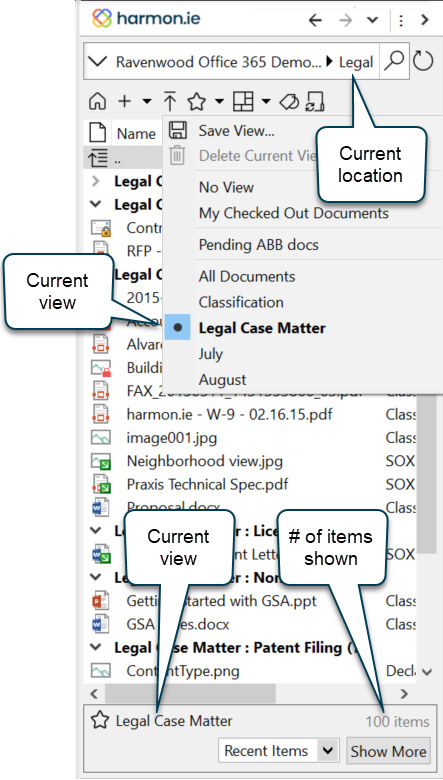
To select another view for the current library, click the Select View icon () in the toolbar and select a view from the list.
What changes when a view is selected?
When a view is selected:
- The status pane shows the selected view.
- In the View menu, the current view is indicated with a black dot.

What view is selected by default?
- By default, the default SharePoint view is selected when you first visit a library/list.
- You can configure harmon.ie to select No View by default: you will see all items, and the columns you selected to view.
- When uploading documents to harmon.ie, they are temporarily added to the current view, and an asterisk (*) is added to the view name.
How to work with groups

- When Group By is defined for a view, the harmon.ie tree view groups the SharePoint items by category. Two levels of grouping are supported. The Collapsed / Expanded initial state is taken from the SharePoint settings. Paging is not supported.
- Right-click a group header and select Expand All / Collapse All to expand or collapse all groups at once.
- Use the arrow icons to expand (
) or collapse (
) a group.
- The order of the groups is retrieved from SharePoint. You can only sort the items within a group.
- It is recommended to use a Group-By view when working with large libraries, as data is retrieved from SharePoint only when a group is expanded.
- You can change Group By settings.
How to save a personal view
This feature works in SharePoint 2013 or later.
After customizing the documents view – using sort, filter by columns, filter by tags, and/or selecting visible columns – you can save your current view as a SharePoint personal view. To do so:
- Click the Select View icon (
) in the toolbar and select Save View as.
– or –
Right-click a column header name and select Save View as. - Type a new view name and click OK.
The new view is added to the views list of the current document library. You can add this view to your favorites list so you can easily access it later on. You can also delete a personal view.
To delete a personal view
- Click the Select View icon (
) in the toolbar and select the view you want to delete.
- Click the Select View icon again and select Delete Current View.
- Click Yes to confirm.
How to close the current view
To close the selected view and see all items in the library/list with the columns defined in the Visible Columns dialog, click the Select View icon again and select No View.
